Plants
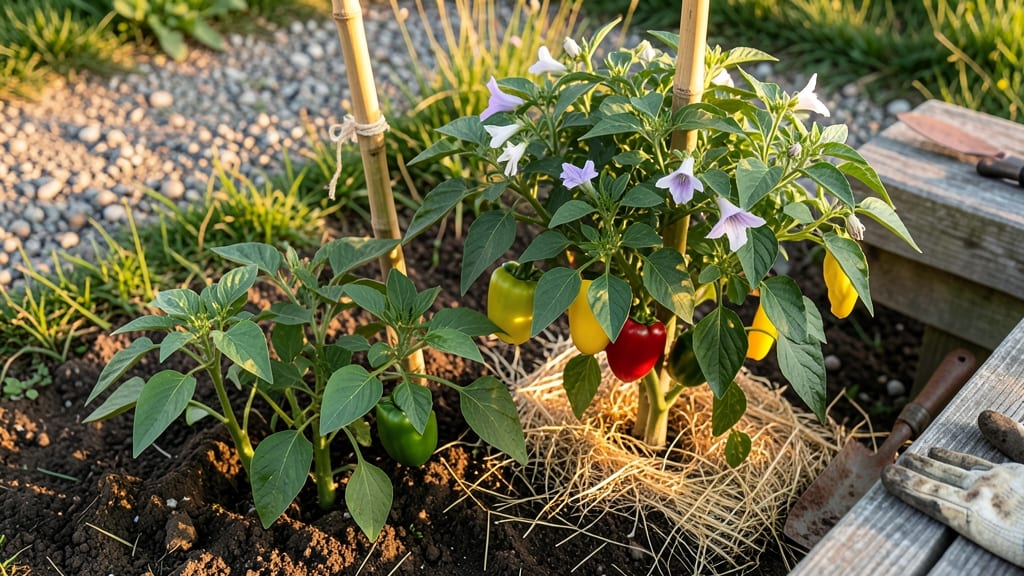
Timing your 🌶️ bell pepper planting in Virginia isn’t just about the calendar—it’s about catching that sweet spot between last frost and scorching summer heat. Plant too early, and a late frost will wipe out your seedlings; too late, and your harvest shrinks before fall’s chill sets in.
Most Virginia gardeners know the April 15–May 15 window is ideal, but the real secret lies in soil temperature. Bell peppers need soil that’s at least 60°F—warmer in the Piedmont, cooler in the mountains—and that’s where local microclimates change the game.
Whether you’re in Richmond or Roanoke, I’ll show you how to nail the perfect planting window for your zone.
You’ll also discover how to prep your soil for faster growth, including tricks like black plastic mulch and compost piles to warm the earth up quicker. No more guessing—just a clear, step-by-step plan to get your peppers thriving from seed to harvest.
Ready to avoid common mistakes and maximize your yield? Let’s dive into the exact timing, soil prep, and regional tweaks that’ll turn your Virginia garden into a bell pepper powerhouse.
Virginia bell pepper planting timeline: frost dates, soil temps & best months
Virginia’s diverse climate zones—from the Coastal Plain to the Piedmont and Blue Ridge Mountains—create wildly different planting windows for bell peppers. One wrong move (like planting too early) can mean frost-nipped seedlings or stunted growth.
The key? Soil temperature and last frost dates by region. Let’s break it down so you can time your plantings perfectly for a bountiful harvest.
Bell peppers are warm-season crops that need consistent soil temps above 50°F to thrive. In Virginia, this typically means waiting until mid-April to mid-May, but your exact timing depends on where you live. Mountain regions (like Roanoke) have later frost dates than Coastal areas (like Norfolk).
Use a soil thermometer to confirm readiness—60°F+ is ideal for transplanting seedlings.
Here’s the critical planting window for Virginia’s three main regions, including frost dates and soil prep tips to avoid common mistakes.
| Region | Last Frost Date | Best Planting Window | Soil Temp Goal | Transplant Ready |
|---|---|---|---|---|
| Coastal Plain (Norfolk, Virginia Beach) | March 20–April 5 | April 15–May 1 | 60–65°F | Early April (start indoors) |
| Piedmont (Richmond, Charlottesville) | April 5–April 15 | April 25–May 10 | 55–60°F | Late April (soil test first) |
| Mountains (Roanoke, Blacksburg) | April 15–April 30 | May 1–May 15 | 50–55°F (minimum) | Early May (extend season) |
🌱 Pro Tip: Use black plastic mulch 1–2 weeks before planting to warm soil faster!
If you’re starting seedlings indoors, begin 8–10 weeks before your region’s last frost date. For Coastal Virginia, that’s mid-January to February, while Mountain gardeners should wait until late February to March. Use grow lights to prevent leggy seedlings—bell peppers need 12–16 hours of light daily indoors.
Direct sowing bell peppers in Virginia is risky unless you’re in the Coastal Plain, where soil warms earlier. Most gardeners opt for transplants from nurseries or their own seedlings.
Harden off seedlings for 7–10 days before transplanting to avoid shock. Plant in full sun (6+ hours daily) and space them 18–24 inches apart for proper airflow.
Watch for late frosts, which can still hit after the average last frost date. Use frost cloth or a mini greenhouse for the first week after transplanting if nighttime temps dip below 50°F. In the Mountains, consider row covers until mid-May to protect tender seedlings.
For a longer harvest season, succession plant every 2–3 weeks until early June. This ensures peppers ripen before Virginia’s first frost (typically mid-October in Coastal areas, early October in the Mountains). Choose early-maturing varieties like ‘Early Prolific’ (60 days) or ‘Carolina Wonder’ (70 days) for Mountain regions.
After planting, mulch with straw or shredded leaves to retain moisture and regulate soil temperature. Bell peppers are drought-sensitive, so water deeply 1–2 inches per week, especially during fruit development. Avoid overhead watering to prevent disease like pepper blight.
Timing your bell pepper planting in Virginia isn’t just about the calendar—it’s about reading your microclimate and preparing your soil. With these regional guidelines, you’ll avoid the top 3 mistakes Virginia gardeners make: planting too early, ignoring soil warmth, and skipping frost protection.
Now grab your soil thermometer and get ready for a pepper harvest that’ll last from July through October! 🌶️
Hot-spot soil preparation: how to warm up Virginia soil faster for pepper success
Bell peppers thrive in warm soil—ideally between 60°F and 90°F—but Virginia’s spring chill can delay planting. If your soil stays below 50°F, seedlings will struggle, leading to poor root growth and stunted plants.
The key to success? Creating hot spots where soil warms up faster than the surrounding area.
I’ve tested three proven methods in my Virginia garden: black plastic mulch, compost piles, and cold frames. Each has its pros and cons, especially when balancing cost, ease, and effectiveness.
For example, black plastic mulch can raise soil temperatures by 10–15°F within days, while compost piles add organic matter that retains heat longer.
To decide which method works best for you, compare the organic vs. synthetic options below. My top pick? A combination approach—using black plastic mulch over compost-enriched soil—gives the fastest results with long-term soil health benefits.
Before you plant, test your soil temperature with a soil thermometer (insert 2–4 inches deep). Aim for 60°F or higher—any lower, and your peppers will linger in the seedling stage. Pro tip: Check temperatures on sunny afternoons; mornings can be misleadingly cool.
For organic gardeners, I recommend mixing well-aged compost into the top 6 inches of soil at least 2–3 weeks before planting. This not only warms the soil but also improves drainage, which peppers despise.
If you’re in a hurry, top-dress with straw mulch after laying black plastic to trap extra heat.
Once your soil hits the ideal temperature range, transplant your peppers 12–18 inches apart in a full-sun location. Pair this with drip irrigation to keep roots consistently moist—peppers hate soggy feet but need steady water.
With these hot-spot techniques, you’ll see faster germination and stronger plants ready to produce peppers weeks ahead of schedule.